Showing posts with label from the girls' room. Show all posts

Thursday, September 16, 2010

{DIY} Hanging Book Shelf

This blog is no longer active. All content from this blog has been moved to my new website: LoriDanelle.com. To view this post on the new site, click here.
*********************************************************************************************
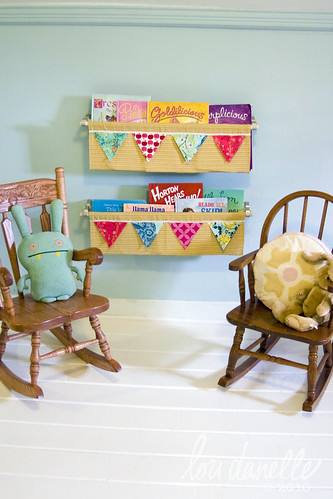
CRW_0621

The hanging bookcase is not an idea that originated with me. Too bad, because it's really quite brilliant!! :) If you do a web search you'll find a few different ways to do it if you don't care for how I went about it.

I knew I would have little girls pulling on this, so I made sure that it would be very sturdy from the start. To achieve this, I used some upholstery I had on hand from previous project to make the baskets. I knew I would need to screw the double curtain rod brackets directly into a stud in the wall and that I couldn't trust wall anchors with my little girls. I found the studs in the basic location I would be hanging it and measured how far apart they were, center to center.


In newer houses, building codes specify that studs be spaced 16 inches apart from center to center. In older houses, I've discovered that pretty much anything goes. :) To find studs, you can use a stud finder, available at your local hardware store, or if you live in an older house like ours, it may be painfully obvious! Just look for the bowing in the sheet-rock and the nails popping out!! (OK, it's not that bad, but I can still tell where they are if I look closely.) Either way, I would use the 16" rule as an estimate, but double check by actually finding the studs.

This measurement tells me where I am going to put my hardware. The distance between—inside edge of one bracket, to inside edge of the other—gave me the width I needed to make my fabric basket.

To start, cut a rectangle 20" high x 24.25"wide.
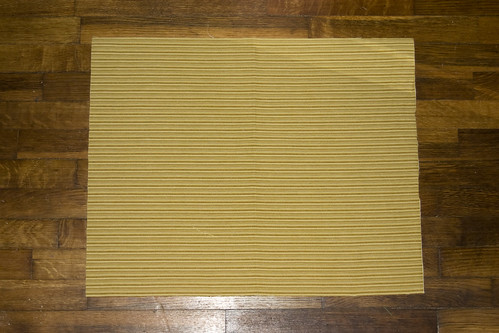
CRW_0453

Serge, or zig-zag around all the edges to keep the seams from fraying.

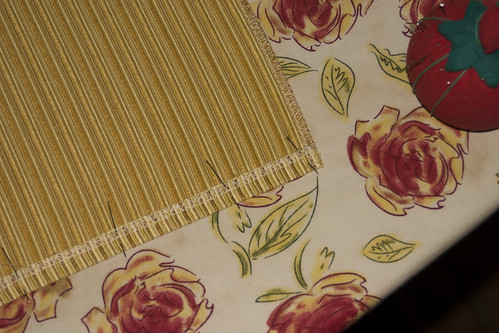
Fold, iron & pin both side seams in 1/2" towards the wrong side of the fabric.
CRW_0456

Sew along folded edge approximately 1/4" away from edge. For aesthetic purposes, I did 2 rows of stitching.
CRW_0457

On the top & bottom edges, fold, iron & pin seams in 2" towards the wrong side of the fabric (same direction as the side seams).

Sew along the folded edges 1.5" away from the edge. Again, for aesthetic purposes and a little extra strength, I sewed 2 rows of stitches. This will create the channel that you will feed the 1/2" dowel through.
CRW_0458

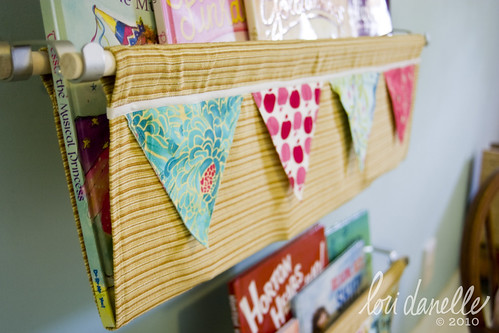
I wanted to tie in the bunting that I had made to hang over the girls' beds in these book shelves, so I added it to the fronts.

Use the same 1/4" bias tape that you used for your bunting.
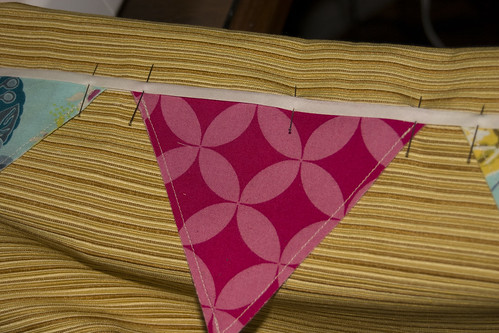
Unfold it and pin in place, so that the folded edge is closest to the top of your hanging basket. For a guide, I lined the fold of my bias tape up with the top row of stitching on the basket. Stitch in place, leaving the top half of the tape free.
CRW_0459

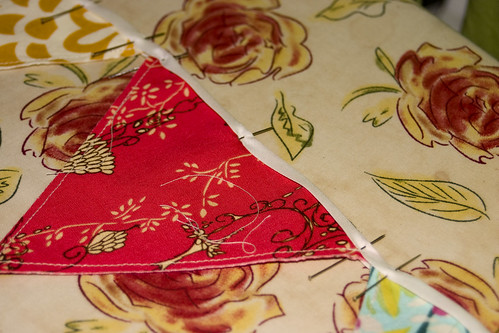
Arrange the triangles as you would like them, matching the top edge of the triangle to the inside fold of the bias tape, sandwiching it between the top and bottom of the bias tape. Pin in place.
CRW_0460

Sew 1/8" inch from the open edge of the bias tape.
CRW_0461

Now all you have to do is insert your 1/2" wooden dowels and your basket is ready to hang and fill with books!
 CRW_0627

xoxo Lori Danelle

Tuesday, August 10, 2010

{DIY} Bunting

This blog is no longer active. All content from this blog has been moved to my new website: LoriDanelle.com. To view this post on the new site, click here.
*********************************************************************************************
The last couple of weeks have been quite insane for me!
Good insane, but insane.
A huge jump on realizing dreams of working for myself,
But still busy, crazy, stressful, exciting, and very little sleep.

I'm just sorry it happened in the middle of such a fun time here on my blog!
I believe I owe you a few tutorials, yes?

Let's get started!!

CRW_0634

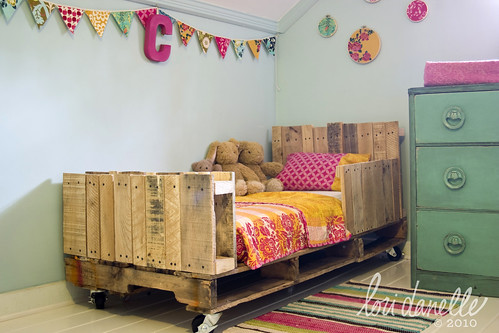
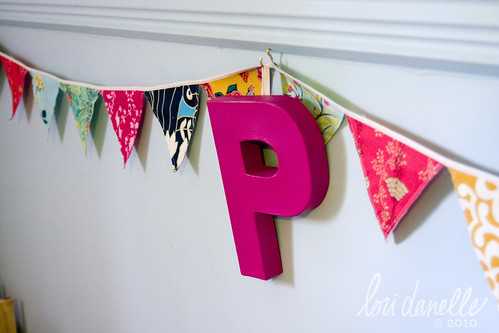
Today I'm going to go over how I made the bunting I used over the girls' beds.

If you've hung around here long, you know I don't like things too perfect, so I made mine with a raw edge. Plus, it makes is super easy to sew up! However, I'll give notes on what to do if you'd prefer a finished edge.

CRW_0025_1

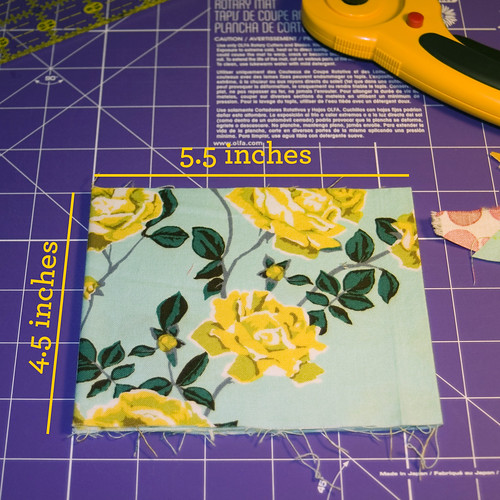
Cut your chosen fabric into 4.5 inch strips, then fold into 5.5 inch sections.

CRW_0026 copy

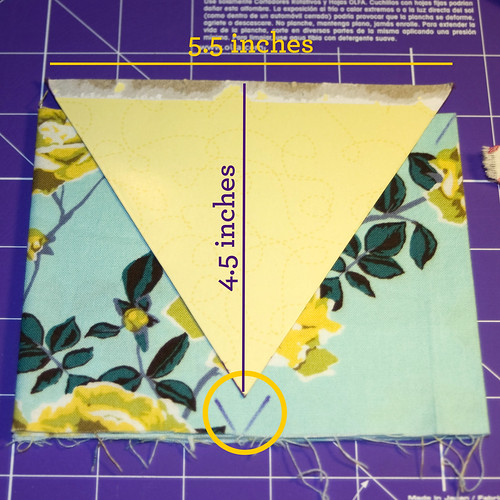
I made a pattern out of cardboard so that I could easily cut out my fabric. To make the pattern, I cut out a rectangle that was also 4.5" x 5.5". I marked 2.75" in on the bottom of one of the 5.5" sides and then drew lines from the top left & top right corners to the bottom center.

I then laid the cardboard pattern on my folded fabric, and marked where the middle point would be with my disappearing ink pen. 

CRW_0029

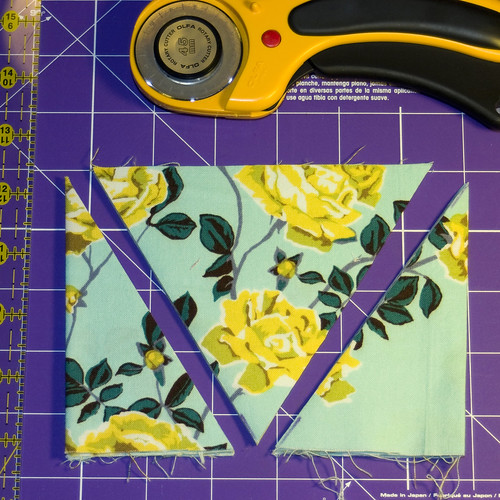
Using my rotary cutter (LOVE that thing!) and a straight edge, I lined the straight edge up to the top corners and the lines I marked for the bottom point and made my two cuts.

CRW_0031

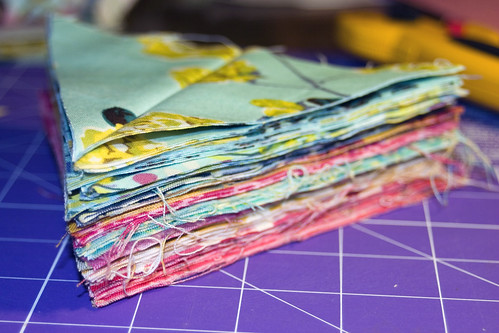
This will give you a stack of triangles in the middle, and if you unfold the left & right side, you'll have two more sets. There will be some smaller pieces folded up in there from the edges of your fabric. Follow these steps with as many different fabrics as you'd like until you have enough pairs of triangles to extend your desired distance.

CRW_0033

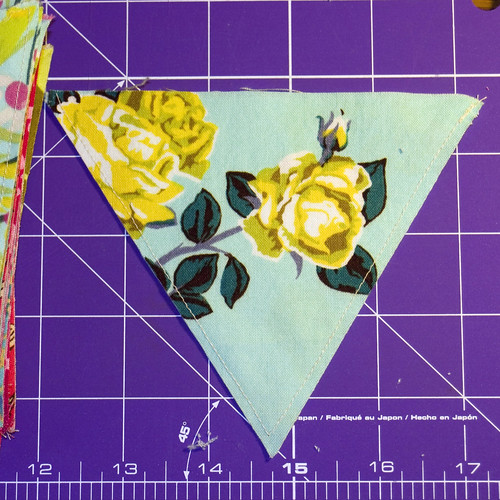
If you want to go with unfinished edges like I did, place two triangles WRONG sides together, pin & sew 1/8th inch from the raw edge on the left & right sides. If you would like, I you can sew the top as well, but there really is no need.

(If you want  finished edges, place two triangles RIGHT sides together, pin & sew 1/8th inch from the edge on the left & right sides—leave the top open. Use a pointy object, such as a pencil or scissors, to turn the triangles right-side-out and push the point out. )

To go the really easy route, use purchased biased tape in the width of your choice. The tape I used was 1/4" wide. If you prefer you can make your own. Sandi Henderson has a good tutorial on her blog on the right side for making it yourself if you want to give it a shot.

CRW_0783

With your fingers, open up the biased tape and lay your triangles in the middle, lining the top edge of your triangle up with the center crease of the bias tape. Fold the tape back down and pin at the two edges and in the center of the triangle. Do this along the length of your bias tape until you get it as long as you'd like.

Moving to your sewing machine, sew as close as you can to the open edge of the bias tape, thus securing the triangles and sewing the tape closed.

CRW_0639

Ta-Da!!!
Hang it up and you're done!!!

Too cute and much too easy! :)
Nice little way to add some color & a personalized touch to a room. . .or even a party!!!

Now go make stuff!!

xoxo Lori Danelle
Thursday, July 22, 2010

{DIY} Painted White Floors

Originally, I hadn't planned on sharing with you how I went about painting our floors. But then I remember how much time I spent on the internet searching and pouring over websites that had any mention of how to do it.

I was REALLY nervous about painting the floors. I was scared that it wouldn't look the way I envisioned, or that the paint wouldn't wear well. Before I finally committed, I read a ton and talked to several people at our local Sherwin Williams store.

In the end, this is how we did it. And I'm happy with the results, so perhaps it will work for you as well!

CRW_0602

We started the whole process by ripping out old carpet and laying down new pine flooring.

IMG_6559_1

We went with a softer wood like pine because we wanted it to get beat up and worn in. So if you select to go with pine, please please please be aware of this! Also, we ordered ours from a website and then picked it up at a local store. We were not aware that it had grooves!!! The only thing I dislike about the girls floor is the grooves! It's a nice place to collect any dirt!  :(  But at least it all goes there and I can sort of walk over it, rather than in it, right?  Anyway, I suggest finding flooring that does not have grooves, or perhaps turning the board over. . .?? That's what I wish we had done.

The next step was filling any nail or floor staple holes, quickly sanding the whole surface down with a palm sander, and vacuuming up all the dust!

Now you're ready for paint!!

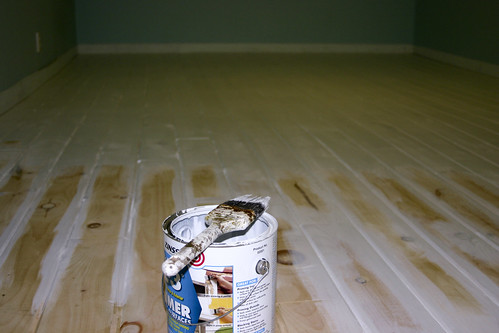
We started by priming the floors. Over the years, we've really come to like Bulls Eye 1-2-3 Water Base Primer/Sealer that we purchase at Home Depot.

IMG_6927

After all my research, we opted to use Sherwin Williams' Floor & Porch Enamel,  in True White. I can't remember now if I did 2 or 3 coats, but my guess is 2.

One place where I strayed from the advice given by Sherwin Williams is that they told us that we could just put down the paint and we wouldn't need to seal it with a polyurethane. They gave us a time frame in which it would need to dry. We gave it that amount of time (something around a week. . .it was a fairly long time) and the paint was still tacky and we would leave foot prints if we attempted to walk on it. Finally, I gave up, said screw this and bought a water based polyurethane for floors and we were moved back in the next day!

To apply the poly, you'll need a special painter's pad and pole. Use long straight stokes. Though water based poly is less likely to yellow, you'll want to be especially careful not to let it get too thick or puddle, as it will still yellow in those circumstances. Apply at least 2 coats and be sure to follow the directions on the package for drying time, etc.

IMG_6944

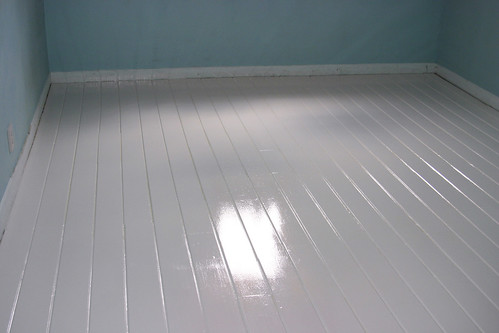
Pretty, shiny, *clean* white floors!!!! (they never looked quite like that again!) :)

White floors are not for everyone. If you're looking for pristine, this is probably not the route for you—unless you have hired someone to meticulously clean the floors hourly!! However, if you like your floors to look worn in, and appreciate the character of  some scuffs and dings, then you may have found the perfect thing!!

Also, we painted the floors in my husband & my bedroom black. We followed the exact same process as described above.

I HATE them.   :)

Painting a dark color did not work out for us. I would paint another floor white in a heartbeat, but if I want dark, we're staining them from here on out!!!

So, I hope that answered some questions you may have. If you're considering attempting this and have questions, don't hesitate to ask!! I know I would have loved to have someone who had done it to ask questions! Painting floors is a bit scary and a big commitment! But I am SO glad I went for it!!

xoxo Lori Danelle

Wednesday, July 21, 2010

{DIY} Distressing Dressers

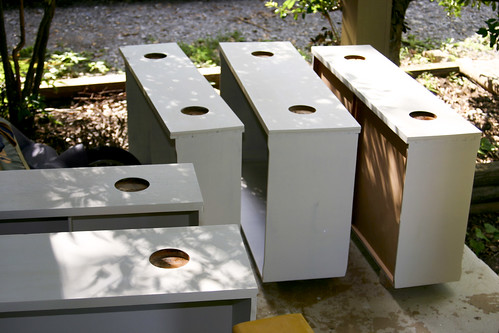
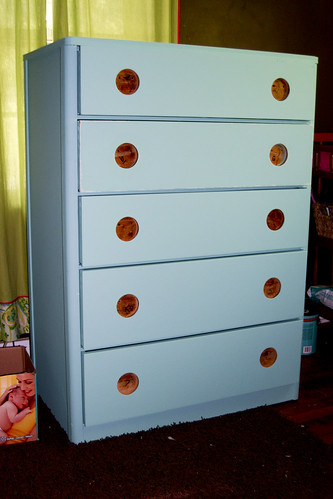
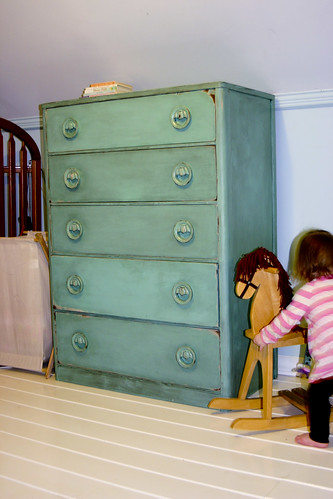
One of my absolute favorite things in the girls' room is their dressers. I really love that they were their Dad's and who knows who had them before he did! I love that they were in really bad shape, and not at all aesthetically pleasing anymore, but with the help of some sandpaper and some paint, they are amazing!! Sometimes new isn't the answer!

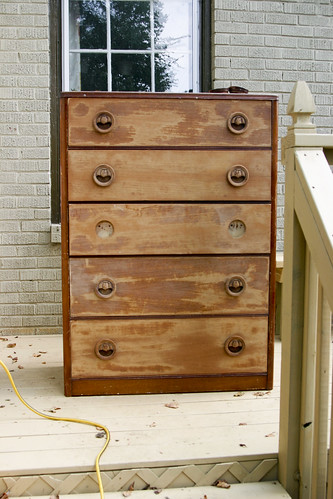
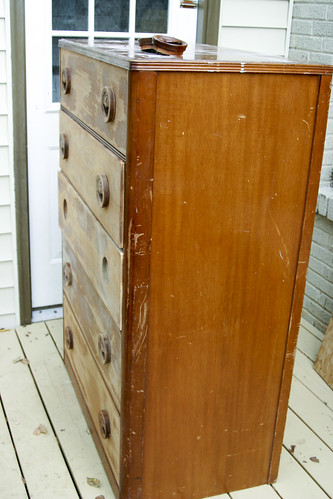
Forgive me as I was new to this blogging, before & after thing when I did these and did not remember to take the before picture until after I had sanded the fronts of the drawers! However, this is what I can show you.

IMG_6472

IMG_6475

Yuck! :)

The first step was to take a medium grit sand paper and palm sander and take the old finish off of them. I have heard of people just "roughing up" the varnish and using a primer meant for finished surfaces, but I just don't trust it! I really want to try it and find that it works, but I'm afraid of putting that much work into it and then finding that all the paint chips or scraps off. I've had it happen to other projects (though I didn't use the special primer) and it just makes me nervous! So I sand. :)

I followed the medium grit sandpaper with a quick once over with a fine grit sandpaper. Once completed, I vacuumed off all the dust and wiped it down with a damp cloth to ensure that all the dust was gone.

Ideally, I would have sprayed these with a spray gun and air compressor, but as most of us don't have those available to us I used a smaller foam roller instead. :) The foam roller is better suited for this application than a big fluffy polyester roller. It gives a smoother finish and because of it's smaller size, is easier to maneuver on furniture.

I started with a base coat of white paint in Glacial Tint (Behr). I gave it to coats of this. When I sanded it down to give it an antique or distressed look, I wanted the "older" paint to show through.

IMG_6479
IMG_6480

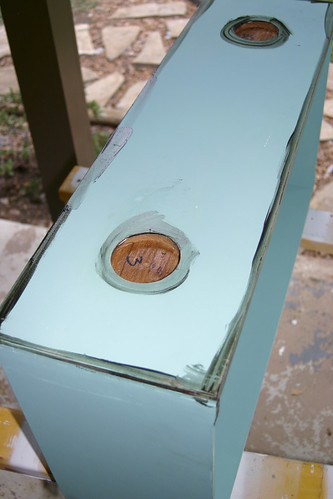
Once that was fully dry, I gave it two or three coats of my turquiose paint. Here I used Winter Surf (Behr).

IMG_6513

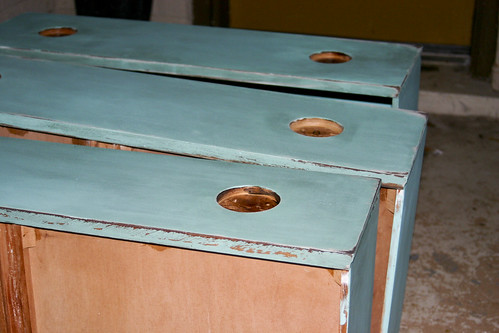
Once the blue paint was absolutely, completely dry, I took back out the sand paper, without the palm sander this time, and sanded down the paint in select areas.

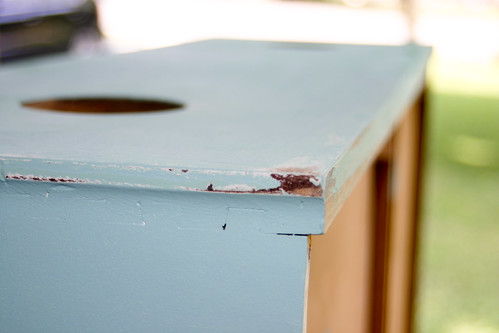
My goal was to make it look like it had worn naturally, so I concentrated on areas that would typically see a lot of wear. Namely, any edges & corners, around the handles, and where the drawers fit into the dresser.

IMG_6523
IMG_6527
IMG_7161

Once I was satisfied with how worn down I made it, I wanted to take it a step further by using an antiquing glaze. I found mine from Lowe's Valspar line.


Be sure to follow the instructions on your glaze. Not sure if they all work exactly the same. I found that it was easier to use if I applied it inside as it was able to stay wet longer, but I did do most of the parts outside.

Using an old cloth, I first applied the glaze to the areas I wanted the darkest. Again, it was also the areas that would see the most wear.

IMG_6657

Then, working quickly, I rubbed it over the entire surface. With a new clean cloth, I then wiped it off, working in circular motions, until it was at the darkness I was going for. At times, I would have to add more on to either get it darker, or get the area wet enough to manipulate and rub off.

IMG_6659

I finished the dressers by applying a water based polyurethane with a spray gun. We finally broke out my mother-in-law's at the end! :) I'm really glad we did because it allowed me to apply the poly thinly as it can yellow if put on too thickly. Plus, it kept any brush strokes from showing.

And ta-da!!! All done!!

IMG_7394

One (or two, in this case!!) newly beautified dresser for your enjoyment! And best of all? It was cheap and you did it yourself!! That's always a nice feeling! :)

xoxo Lori Danelle

Monday, July 19, 2010

{DIY} Paper Lantern & PomPom Grouping

This blog is no longer active. All content from this blog has been moved to my new website: LoriDanelle.com. To view this post on the new site, click here.
*********************************************************************************************
Since the Sisters' room is so jam-packed with things that I made myself, I thought I'd share with you how I did them over the next week or so (or how ever long it takes to fit it all in!!)! That's what you've really been wanting anyway, right?

Some of these projects I've shared over that last year in whole or in part, but since so many of you are new—(WELCOME!!! I'm ecstatic that you've found your way here & like what you see enough to come back!)— I thought I'd start by re-sharing some of those projects so everything could be found in one place.
 I have a hard enough time hunting down stuff that I know is there, let alone trying to find something that I hope might be there! :)

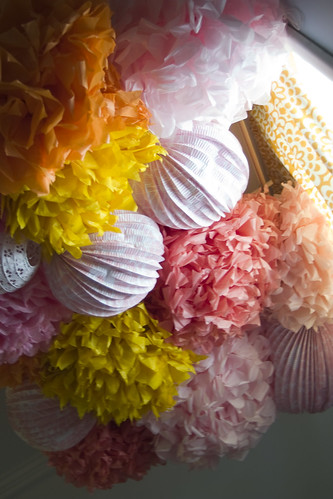
First up, the Paper Lantern & PomPom grouping!

CRW_9801

It's no secret I love the room Ashley Ann created from her daughter, and this is another project that was borrowed from that room.

When I made my grouping, all the supplies that Ashley had used were no longer available, with the exception of the pom-pom kit which I found at Michael's. However, I just did an on-line search, and I didn't find them now. Oh well! You don't need it! You're about to get the tutorial!! (and save a bunch of money!! She charged rather a lot for some tissue paper!!)

IMG_1578

For the pictures shown here, I was using the paper supplied in the kit.
However, these were SO EASY a kit was definitely not required!! In fact, I've made many more without the kit, including the yellow and orange pom-poms shown in my grouping.

For each pom-pom, you'll need:

10 sheets of 17in x 30in (Medium) tissue paper in desired color
—OR—
14 sheets of 20in x 30in (Large) tissue paper in desired color
12in section of floral wire

(I'm using paper from the kit which is pre-scored & cut, but this isn't necessary to have done already)

Lay all 10/14 sheets of tissue paper in a stack

IMG_1572

Accordion fold into 1 3/4 inch sections. No need to stress about how precise you are. Just get close. All your folding will be undone before we're finished!

IMG_1573

Once the whole length is folded, Cut the ends either into a point or a half circle, depending on desired results. ( I do not have a picture of this step, as I mentioned, mine was already done.) You can see how each would look in the top pictures.

Now, wrap and secure it in the middle with the wire.

IMG_1574

Fan out the folds and begin to separate the individual sheets of tissue paper.

IMG_1576

Once you've completely separated the sheets, shape it into the desired pom-pom.

IMG_1577

Fold and twist the remaining wire into a loop to use for hanging.

Additional lanterns can be purchased in many places, but I found mine here, at Luna Bazaar

For a frame, I just took 4 dowels purchased from Home Depot and made a rectangle by first drilling pilot holes and then threading them with eye bolts, so that I could then hang it from the ceiling.

Attaching the pom-poms and lanterns was a little bit of trial and error as I arranged and re-arranged until I like the look. I attached everything by using wire that I could easily secure and remove if needed!

And that's it!!!!
Really.
Super easy.
And lots of fun.

If you still don't like the idea of making your own pom poms from scratch I know of a few etsy shops that sell kits in any shade your heart can dream up! All you would need to do is unfurl them. Just do a search for pom pom and you'll definitely find something to suit your needs!!

Enjoy!

(and let me know if you have any questions!)

xoxo Lori Danelle

LinkWithin

Related Posts with Thumbnails