Wednesday, June 30, 2010

{Paper Cut} Nate + Lori

NateLori1

This is what I've been working on over the last month when I wasn't building toddler beds, scraping doors or celebrating an anniversary! I'm so happy with how it turned out.

I'm also happy to announce that I'm going to start cutting personalized fingerprints just for YOU! Each piece will be hand-cut by me, using your very own, unique fingerprint. Just as no two fingerprints are the same, no two paper cuttings will be the same either!!

Fingerprint paper cuttings are perfect for commemorating the addition of a new child or as a special keepsake to celebrate your wedding or anniversary! They also make a unique alternative to the traditional family portrait.

Price List

A. 8 x 10 Single Print (no text) $150
B. 8 x 10 Single Print (simple text) $200
C. 8 x 10 Single Print (text frame) $250
D. 11 x 14 Double Print (no text) $300
E. 11 x 14 Double Print (equation text) $350
F. 11 x 14 Double Print (simple text) $350
G. 11 x 14 Double Print (text frame) $475
(Prices do not include shipping)

Payment will be accepted through Paypal. Paypal is a safe and secure way to make credit card purchases on the internet. For more information, please visit www.paypal.com

As a rule, I will complete paper cuts in the order in which payment is received. However, please make me aware of any deadlines when you first inquire. I'd like to make sure everyone gets theirs by the time they need them, if possible!

If interested or if you have questions, please contact me at loridanelle@yahoo.com.

LoriPrint

Charlie1

I look forward to creating a unique paper cutting, just for you!!

xoxo Lori Danelle

Inspiration for Today: 06.30.2010

reclaimed-wood-boxes

Source unknown
( if this is yours or you happen to know where I found it, please let me know!! I would love to give credit to the right person!)


Since I've been on the topic of old & reclaimed wood lately, I thought I'd share a picture with you that's been in my inspirations folder for awhile now. I think I could definitely find a place in my home for a couple of these! Love all the color! And I wouldn't have to worry about my 1 & 3 year olds messing them up!!

xoxo. Lori Danelle

Monday, June 28, 2010

Summer Weekend: work hard, play hard

******I received reports that the photos were not showing up this morning, but to the best of my knowledge, and a lot of checking by my co-worker, I think I have it fixed! So sorry!! No idea what happened! Let me know if there are still issues though.******

One day, hopefully not in the too distant future, I won't have a thing I must do on my weekends.
But that's not happening yet!!
Instead, a good portion of my days were spent outside in the near 100 degree heat attempting to strip down a couple of doors. (I have more than a couple to do, but that's all I got to this weekend!)

CRW_9842

CRW_9841

60+ year old doors are kind of funny. If you have to strip them, you'll notice, they have quite a bit a paint on them. Perhaps I'm a little overly nostalgic, but even in the paint, like old wood, I think to the story the paint would tell. Some of the colors I found hiding were quite normal, just slight variations of white & cream. Then there was pink. The shade that used to be oh-so-popular for bathroom ceramics. I wonder if my house used to boast a pink toilet & matching tub. . .??

When not scrapping a door, we played! This weekend was a little different in that Big spent most of the time over at her Papa's house along with her older cousin. That meant some quality time with Little.

CRW_9880

I really enjoy having each of the girls one-on-one. I think they enjoy it too! A chance to be together without feeling the need to compete for Mommy or Daddy's attention! Not having to share toys! Getting to pick what activities to do! Oh bliss!!

CRW_9888

We knew big was going swimming and having all sorts of adventures, so we tried to make the weekend special for Little as well. Best thing to do in 100 degree heat? Turn on the sprinkler!!

CRW_9817
CRW_9812
CRW_9814

And no, the dog is not about to ferociously attack her in the last picture. That crazy dog went NUTS when we turned on the water. He might have enjoyed it more than Little! I think he kept trying to bite the water. It was rather funny to watch.

After our fun in the water we picked some zucchini from the garden. Apparently, we missed a few days because the zucchini we picked were ENORMOUS.

CRW_9844

The one on the right? No, it's not really small. It's how big the rest of them should have been. I don't think I've ever seen one that big!

So do you typically work or relax on your weekend? Is my dream of lazy weekends just a myth? Please tell me at least some of you get to enjoy lounging around drinking lemonade! :) Please!

xoxo—Lori Danelle

Saturday, June 26, 2010

{DIY} Toddler Pallet Bed

This blog is no longer active. All content from this blog has been moved to my new website: LoriDanelle.com. To view this post on the new site, click here.
*********************************************************************************************
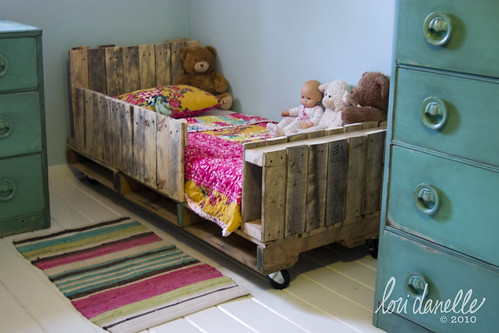
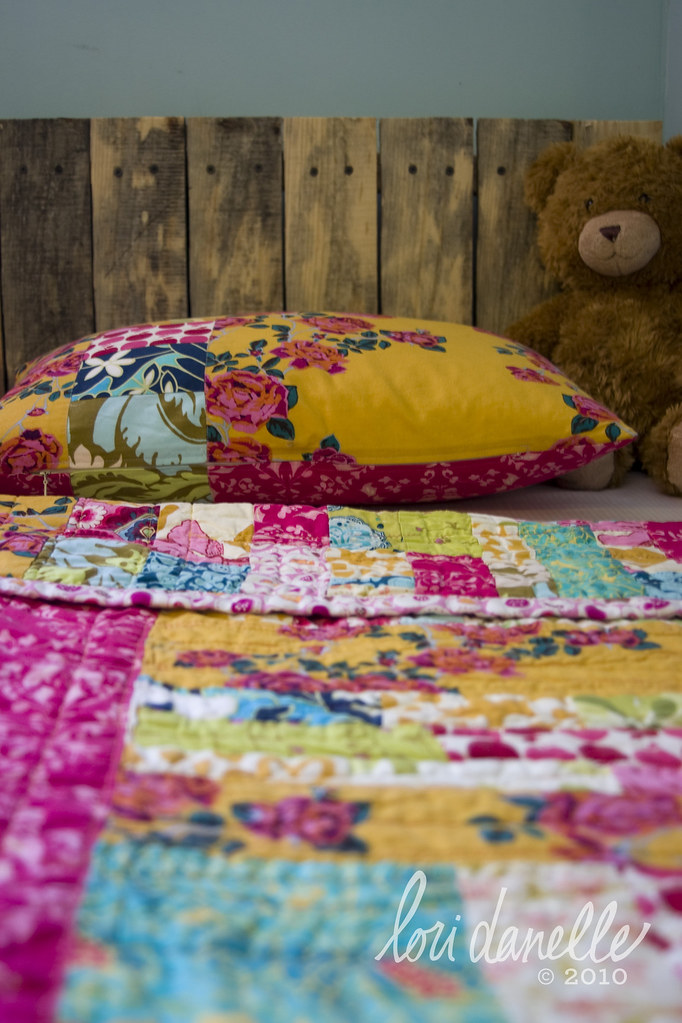
So I thought I'd share with you how I made Little Sister's toddler pallet bed, because I know you're staking out dumpsters at warehouses and such, trying to get your hands on a couple of pallets so you can make a bed of your own. Right? OK, maybe not that desperate, but still, you're curious. :)

Plus, this will save you from half a dozen trips to Home Depot throughout the duration of the project for supplies you had no idea you needed. ( no, I'm not speaking from experience. . .OK, OK, maybe I did take 5 trips. )

CRW_9695

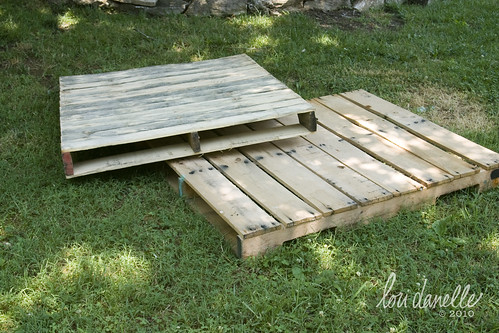
To start you'll need at least 2 pallets, 3 if you're going to need to do any repairs to your pallet — and spare parts are never a bad thing.
The ones I used were 48 x 40 inches and had the slats pretty close together, which is how I achieved the head & foot board. Also, the 40" worked perfectly for a toddler bed, which you'll find out why in a moment.

You will also need:
• 4 – 5 bolts, (long enough to go through 2 widths of bracing when butted up next to each other) washers & nuts
• short wood screws (long enough to go through the slats & into the next board, but not through)
• long wood screws (long enough to go through the bracing and into the next board, but not through)
• one 2x4x10 piece of lumber (longer or more pieces if you need to make any modifications due to different pallet size)
• 5 casters with locks

• palm sander with medium grit sandpaper
• circular saw
• drill w/ bits in sizes for your bolts and potentially the screws, depending on age of pallet, condition of the wood & how prone the wood is to splitting
• socket set
• tape measure
• pencil :)
• T-square

****the following could come in handy, but may not be necessary, depending on placement of slats & nails****
• hand saw
• sawsall with blade for metal


Have everything??? OK! We're ready to start!!
(please keep in mind that no two pallets are going to be exactly the same. use these instructions as guidelines, and make adjustments where needed.

Also, I will be referring to the top and bottom boards as "slats" & the 3 center boards as "bracing" so we don't have any confusion)


CRW_9699

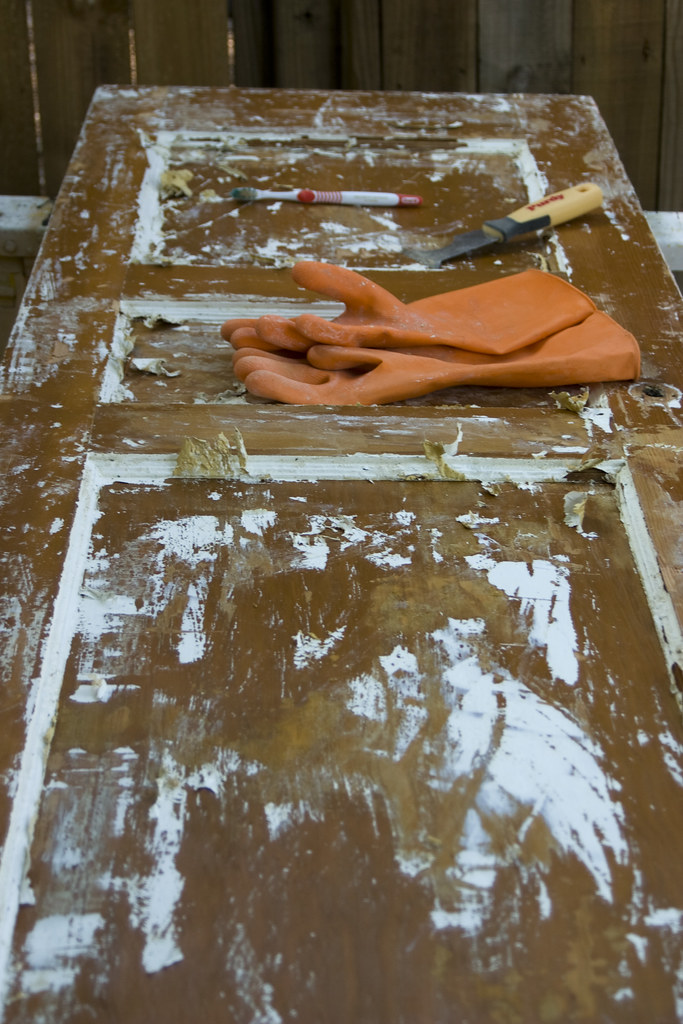
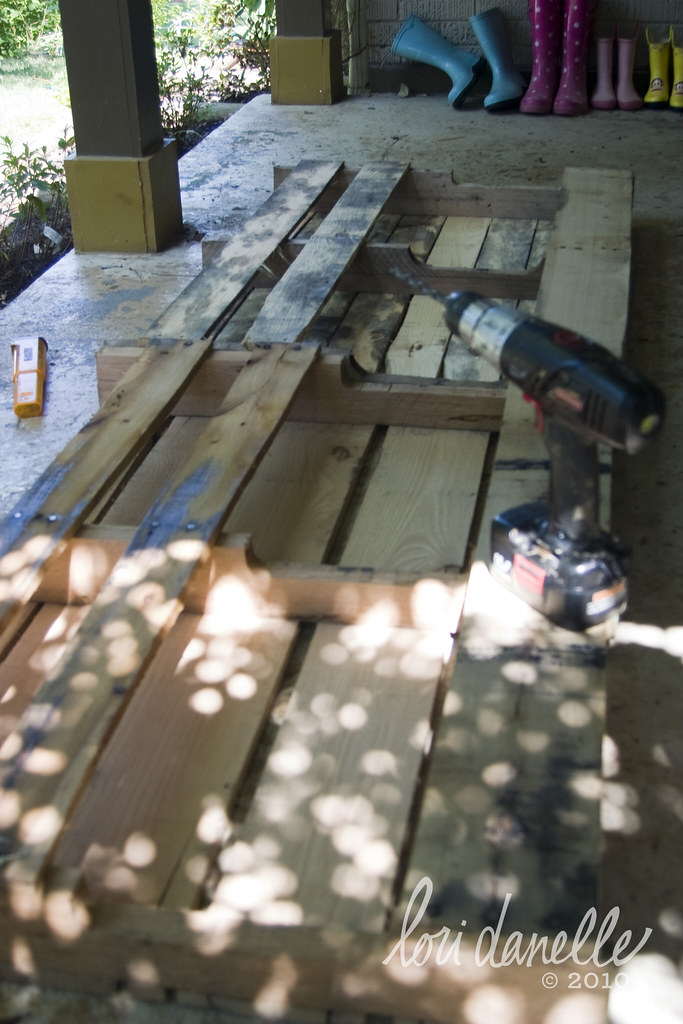
With your palm sander, sand down all the surfaces to keep your little one from getting splinters. I didn't have to sand a whole lot, just got rid of the rough wood, but kept the character. (Once it was built I did go back and sand portions that would be touched often and thus needed a little more caution)

CRW_9701

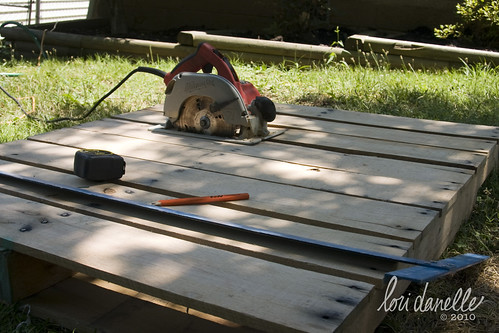
Toddler mattresses are generally 28" wide. So, to start with, using a circular saw, I cut both pallets to 29", cutting ACROSS the bracing, not with it. That gave me two pallets 29" x 40".

CRW_9702

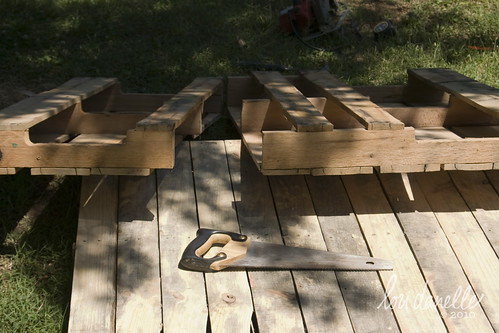
You will have to cut one side of the pallet, then turn it over and cut the other side of slats, as well as each brace from the side. The middle one can be tricky which is where a hand saw can be useful. Also, if you find some nails in your way, a sawsall with a blade for metal, may just be your best friend.

CRW_9703

On a flat surface, lay both 20" x 40" small pallets up-side-down, butting up the edge bracings, matching edges as best you can.

CRW_9704

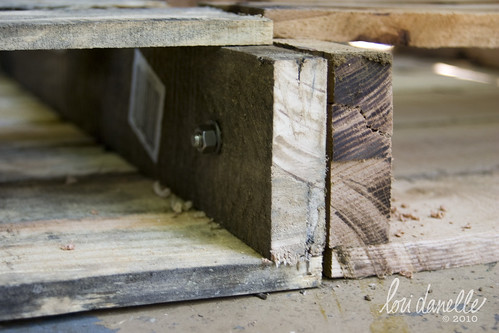
With the drill, drill pilot holes for your bolts through the entire depth of both bracings (clamp together, if needed, to ensure alignment). Put in the bolts and tighten the washers & nuts with a socket set.

CRW_9705

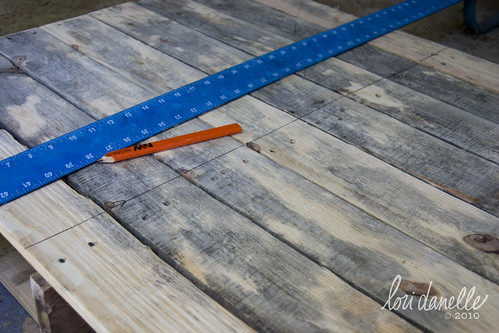
A typical toddler mattress is 52" long. My pallets were 4.5" tall. So, I then drew a line on the connected pallets at 61" (52 + 4.5 +4.5).

CRW_9706

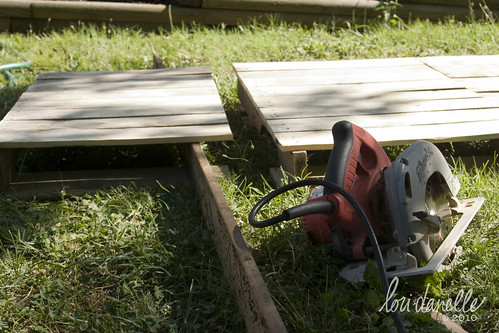
Cut with a circular saw. I found it worked a lot better to place a board under the slats I was cutting to help stabilize them and keep them from drooping after being cut and putting tension on the saw blade.

You might notice that cutting at 61" puts me just about an inch past the middle brace of the pallet. This is perfect for my toddler bed! If however, your cut has to go on the other side of the brace, you will need to reinforce the slats by screwing/nailing a 2x4 (or whatever size is appropriate to your pallet) inside the end of those slats.

CRW_9707

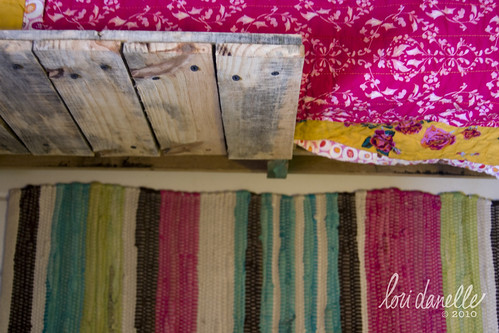
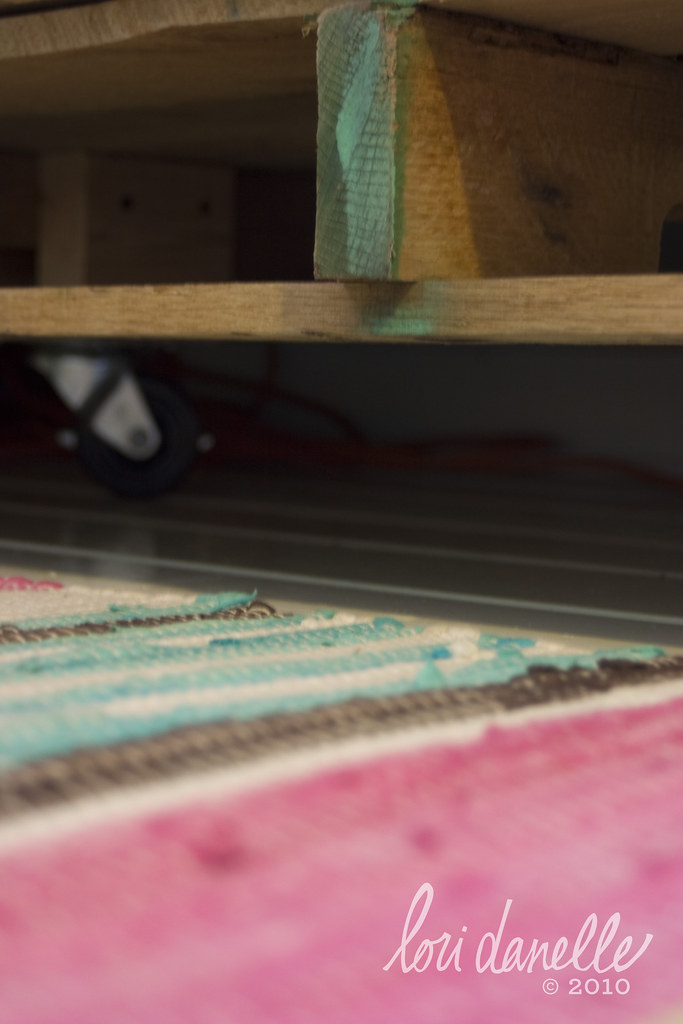
Flip the pallet over and attach your casters at each corner and one in the middle where the 2 pallets come together. If your screws will be close to the edge of a board, or the boards are prone to splitting, drilling pilots will help alleviate splitting. Of course, good help is always welcome. :)

CRW_9708

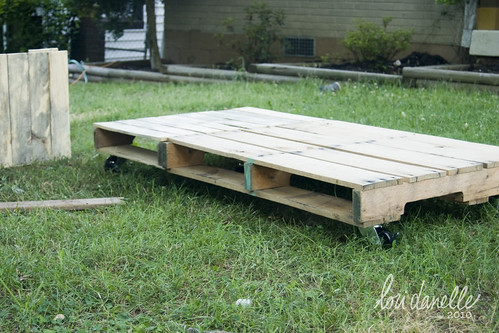
Flip the thing over and Whoo-Hoo!! You're almost there!!

Next step, head & foot boards.

CRW_9718

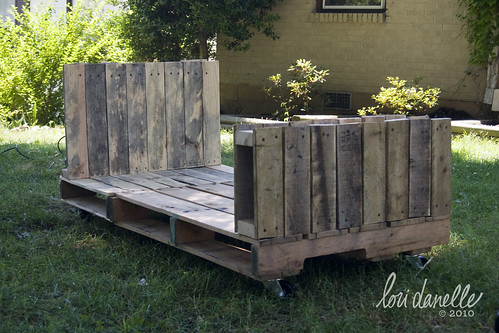
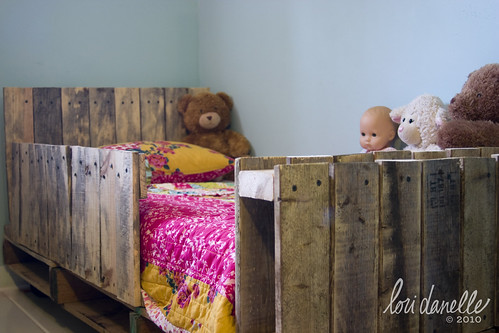
Using the 29" wide section that you cut off from the connected pallets, flip is up on end, so that the bracing sits on the edge of the bed. Drill pilots holes, then screw into place. Cut a section of 2x4 to stabilize the slats and screw in place a few inches from the top of the slats.

For the foot board, cut two sections from the 2x4, 29" long. From the remaining parts of the pallet, cut the slats into 12" sections and then screw/nail them to the 2x4s on ONE side, aligning with the bottom. Then flip this up on end and place on the end of the bed, leaving space for the final row of slats from the very edge of the bed. Drill pilot holes, then screw in place. Screw/nail the other 2x4 to the slats a couple of inches from the top. (If you do this step sooner, you will need a 90 degree drill in order to be able to screw it in place)

Attach the slats to the other side of the 2x4s.

If adding side rails, repeat the steps for the foot board, cutting your 2x4 to the desired length & only attaching slats to one side. Run a 1x4 across the top to stabilize. Then screw into the pallet. You may need an extra pallet for this step, depending on the type/size of pallet you use.

CRW_9751_2

And there you have it!! One ridiculously cute bed for well under $100!!

If anyone gives this a try, please send pictures!! I'd love to see your interpretations! And let me know if any of the steps don't make sense. I'll try to clear it up for you!!

Enjoy & Happy Building!!

xoxo—Lori Danelle

I also have plans of making another one for Big, as she requested. Hoping to get my hands on more pallets this week & built next weekend, so I'll have pictures for you as soon as I can. We'll see if my instructions change any if I get pallets that are a little bit different. I'm crossing my fingers that they'll be the same — I've already got this way figured out!!

If you haven't already, be sure to check out the latest installment of Preschoolers 101 over at Southern Institute for Domestic Arts & Crafts!! Today Heather is talking about little one's emotions! Good stuff!!


**********************************************************************
Any comments that are overly critical and/or mean will be deleted. I've read my share of negative comments on various blogs where this bed has been featured and don't need them here. I would never go to your personal space and make rude or judgmental comments about something of yours. I expect the same courtesy while you are here.
You do not have to agree with me or like the things I do, but if you choose to voice your opinion, please keep it respectful. If the only way you feel comfortable leaving a comment is by leaving it anonymously, then perhaps you should think twice about leaving it in the first place. 

Lori Danelle


Friday, June 25, 2010

Jumble of Paper Beads

I've decided to delve back into my creative past and see what things I've made pre-blog era of my life that I can share with you. Not entirely sure what I'll come up with, but I do know the first thing I'll show you. Here's a peak:

CRW_9803

It's been residing in my basement for the last couple of years, so I need to do a little, uh, clean up on it before I can show it to you with the full pride that I feel. :) Sadly, it's also a glimpse into my creative insanity.

Also, coming next week, (drum roll please!) I'll be sharing a tutorial for how I made my toddler pallet bed. Only seems fair that you should be able to make one for yourself! :)

Oh! Last night I had a very enjoyable girls night out! No idea the last time I did that was. My friend Jenny and I had dinner, browsed around Anthropologie dreaming over dresses that are way too impractical for a Mommy with littles :) and finding inspiration for new projects in their store dressings. Ended the evening with coffee, talking & lots of laughing. It was fun to have someone to talk to about blogging, creativity, children, and what has happened to our bodies post babies(?!?!!?)! (those of you without kids, I'm sorry, things happen that it's best just not to know about yet. there's a reason no one talks about it.)

I came unprepared & did not have a camera. Jenny however did, so you can see a glimpse into our evening over at her blog.

Hope everyone has an amazing weekend! I'll see you on Monday!

xoxo—Lori Danelle

Thursday, June 24, 2010

What's on your heart?

My friend Jenny at Southern Institute for Domestic Arts & Crafts is hosting a Link-Up that sounds like too much fun to pass up! The idea is to share what's on your heart RIGHT NOW. Not yesterday, or even this morning, but what's going on right in that moment.

So here goes!!!

This is kind of funny, because it actually coincides with what Jenny wrote about!

I bite my nails. :(

I've been doing it for most of my life now. When I was 8 or 9 I played soccer and was one of our team's goalies. I remember hearing after the game from my Mom that the other parent's were worried about me and how I'd do & if it was stressing me out too much because my hands were in my mouth the entire time chewing on my nails!! (However, I would then proceed to not let in a single goal!! or very few anyway. :) )

Through the years I've tried to stop, honestly. When I was younger my Mom would paint my nails with that gross tasting stuff. My grandma has a standing offer that was made when I was about 10 for a manicure if I ever stop. In college I even think I really had stopped. . .until my baby brother ended up in the ICU burn center for 2 weeks with acid burns from a car accident, among other injuries. That was just too much for my poor nerves to handle sans nail-biting.

I hate that I bite my nails. I would LOVE to have nails that were worth painting, and didn't look like they do. But so far, I haven't succeeded in stopping. And is some ways had sort of come to terms that this is the way it was going to be & that perhaps some day I'd overcome it, but probably not.

And then Big Sister stared biting her nails.

So now I'm in panic mode. I will not let my precious, beautiful, *perfect ;) daughter have such a nasty habit because of me!!!!! So obviously, first order of business is to get myself to stop. Then her. I knew I needed to take drastic measures, so I've been going to sleep every night listening to this track that basically says " I will not bite my nails. I will not bite my nails" over and over again.

I've also purchased that yucky tasting nail polish again for moments when I unconsciously succumb as a bit of a reminder.

Plus, I've been talking to Charlie about it. Telling her that I'm trying to quit and that she needs to stop too. That it's really bad habit that I have. And playing on 3 year old vanity and telling her if she wants pretty nails/hands she can't bite them.

Last night I tried putting the yucky nail polish on her while I too did mine. She didn't go for it. I don't want to "make" her, but I might have to. Bleck!! And all because I bite my nails!!!

And just so you know, I am making progress! My nails were all my version of long :) until about 2 nights ago when I was majorly stressing and took it out on a couple of fingers. But we do have progress people!!

So if anyone has ideas of how to get Big to stop beyond the nail polish, I'm all ears!!!!

xoxo—Lori Danelle

Also, if you're just dropping in, make sure you check out the first bed I made Little Sister as well her newest pallet toddler bed, if you haven't already!!!

Wednesday, June 23, 2010

2 out of Little Sis's 3 beds.

So I realized yesterday that out of the 3 beds Little Sister has had in her life, I've made 2 of them!

The girls are 17 months apart in age. Which means that when Little arrived on the scene, Big was still sleeping in the crib — and would continue to need to for at least 6 months. That seemed like a pretty short time to anti up for another crib, so I thought a bassinet would be a good solution.

However, the bassinets that I liked, cost as much as an entire crib! (Well, close enough!!) So, being the resourceful, creative type that I am, I decided I would just make one.
So I did.

IMG_4003

Please ignore that bad photos. Poor Little got the shaft when it came to rooms as well! She was going to share rooms with her Big Sister, but as she got up frequently during the night to eat, and had all-around strange sleeping hours, it just didn't make sense until she was more established.
Thus, she got shoved into a corner.

OK, it wasn't that bad.

IMG_4009

I made both the wood frame & the hanging basket.
After Little was done with it, 2 other tiny bundles have spent their first few months of nights in it.
And most importantly, it never came crashing down on any of them!!!

(I did test it first, promise!!)

IMG_4006

So I guess I should start brainstorming about what to make once she grows out of the toddler bed!

xoxo—Lori Danelle

Tuesday, June 22, 2010

Toddler Pallet Bed

This blog is no longer active. All content from this blog has been moved to my new website: LoriDanelle.com. To view this post on the new site, click here.
*********************************************************************************************
 **I'm really excited about this post. I have something I'm pretty tickled with to share with you!! And I've kept quiet about it for 2.5 days because I didn't have "good" photos yet. (my good, not Brad's good!! Although, I wonder if he'd travel across town. . .)
Believe me, I am not good with exciting news.
Can't keep that secret!!
But I did.
And I'm glad, because. . .well, you'll see!!!

So you know how I was talking about pallet furniture and mentioned this bed over at Ashley Ann's?

Well, I did it! It's done!!
CRW_9749_2

A toddler sized pallet bed, just for Little Sister!!!
CRW_9762_2

Starting out, I really didn't know what it was going to look like. I sort of figured it out along the way — which is generally how I do things! ha! But I really like the addition of the head & foot boards. (There were a couple of practical reasons as well, which I'll share in a later post.)

CRW_9785

Plus, as much as LOVE Ashley's room, I really hate straight copying. There's generally nothing wrong with it, but I'd rather introduce a bit of my own self into what ever it is I'm doing. And that makes me feel like this bed is mine, rather than Ashley's. I like that.

Especially since I've already done my fair share of copying from this room! Look familiar? Yes, it's not exactly the same, but pretty darn close!
And my white, pine floors? Yup. You guessed it.
Ashley Ann was among my inspirations.

Hope she doesn't mind. . . ;)

CRW_9790

I added the side rail after Little took her first afternoon nap in it. Though she didn't fall out, a lot of her stuff did & it just made me a little nervous. I think I'm going to go back and shorten it though. Didn't leave very much room for her to get in & out!!

CRW_9774_2

CRW_9777

Best part is, both the girls love the new bed. Big Sister has already put in her order for one just like it. (Tom, I'm going to need a couple more pallets!)

xoxo—Lori Danelle


*****edited 06.28.2010*****

To see how I did it, head on over here!!

This post linked to Today's Creative Blog: Get your craft on Tuesday!

Monday, June 21, 2010

Family Photos from Bradley Spitzer!!!

Though I am not currently employed in my dream job — my dream job is actually a craft room in my house where I can create to my heart's content & people would actually love the things I made so much that they wanted to give me money in exchange for these items — there are a few things about where I work that my dream job just can't compete with:

I am surrounded by some incredibly talented people!

(my dream job can't really compete with my paycheck & benefits package either. Just in case you were wondering. . .)

Bradley Spitzer is one such talented individual. If you've ever been by here, I'm pretty confident you've seen his name pop up. He is our resident photographer and gives me pointers, tips, and tricks to help me improve my photo taking skills.

(Please don't let my photos be any reflection on him! This is mostly done in passing and thus he is in no way responsible for what I then do with these tips, tricks & pointers. One day I'll sit still long enough to figure out what I'm doing on a technical level & then perhaps I'll be good to go!
)


More exciting than any tips, however, is when he actually takes photos for me! Which, as you've noticed, he graciously does fairly often. But about two weeks ago, he even topped that. Not only did he take photos for me, he took them of my family!!!

_MG_3459_HiRes

_MG_3493_HiRes

_MG_3491_HiRes

I LOVE these photos.

They may not be the sort that show off our family in a perfectly posed, perfectly dressed sort of way, but they ooze with the girls' personalities. I'm in awe of how well he was able to capture US.

_MG_3505_HiRes

And sometimes, us is quite silly.

_MG_3523_HiRes

_MG_3530_HiRes

What's really funny about these is that everything you see was taken during the last half of our "session." Perhaps it was just too hot. Or maybe because Brad was a new person they were just a bit reserved, but whatever the reason, the first half the girls were kind of boring. They played on the playground equipment and had fun, but they didn't really shine. Nate & I were starting to feel a little bad for wasting Brad's time. But because a photo with the entire family in it AND looking at the camera is hard to come by, I asked for just a few more of all of us together.

I'm glad I did & we didn't call it quits before that!! I'm not sure what happened exactly, but Big got really, really goofy on us — and thus, we got some really great photos!!!

_MG_3687_HiRes

I especially love these because they were taken the day before Nate & my anniversary. I love that we now have this glimpse into our family as we are right now.

_MG_3772_HiRes

_MG_3806_HiRes

OK, OK. I know that's a lot, but just 2 more!!!

_MG_3819_HiRes

_MG_3909_HiRes

There are so many good ones that it's really hard to choose which ones I should share!! However, you can see the rest ( and I really think you ought to! ) by clicking on any of the above images and then you can click through the rest on my Flickr photostream.

Thanks again Brad!!!

xoxo—Lori Danelle

If you have a preschooler:


My friend Jenny over at Southern Institute for Domestic Arts & Crafts is hosting a special series called Preschoolers 101. Really good stuff so far, so if you have a little one, head on over!

Jenny is a Mom of 3. Her middle child just happens to have been born within a week of Big Sister and her youngest within 2 months from Little! Her oldest, and her only girl, is 7 and Big thinks she is the coolest. Needless to say, this lady has a little bit of experience on the topic. And it couldn't come at a better time! Nate & I have been scratching our heads a little on the best way to handle our emerging little independent person. So far, I'm not sure we're handling it so well. . .So join me, and lets head over and pick up a pointer or two!! Maybe I'll manage to get a perfectly well-behaved 3 year-old yet!!!! Or at least understand why she's acting the way she does!!

xoxo—Lori Danelle

Saturday, June 19, 2010

Quick! Someone have a birthday!!


Because I have to to try these cupcakes!!!!

Cookie Dough Cupcakes?!
A girl doesn't have a fighting chance around those!

You can find the recipe at Annie's Eats.
And if you find an excuse to make them before I do, please tell me they're as wonderful as I imagine!!

xoxo—Lori Danelle

Friday, June 18, 2010

My Daddy's Daughter

My Dad makes stuff.
His jet boat his senior year in shop class.
Our house.
Oh, the house. A source of angst & immense pride.
And absolutely beautiful woodwork.

He made the most amazing raised paneling throughout the entire house. Very intricate.
He loves wood.
So being that I am his daughter, I inherited the gene. But somewhere it got morphed a bit. While I am in awe of the work he has done in the house, it's not my style. I like my wood old & worn in.

So when I saw this earlier today on Design*Sponge, I knew I had to share it with you!


This furniture is from koff designs and is made from reclaimed & recycled wood! I want one! (go to their site for even more pieces!)

I'm not a big fan of pristine & I love to imagine the history and stories that got a piece of wood to it's current state. I love when it's been worn absolutely smooth. Plus, it's nice not to have to worry about messing up the table with a 1 & 3 year-old running around. Any dings would just add to it's charm & keep the story going!

AND!! Ever since seeing this pallet bed over at Ashley Ann's (this whole room makes me swoon!), I have become increasingly enamored with furniture made from pallets!


I happen to have daily access to as many pallets as I can carry. . .OK, more than that. I think I can only carry 1. . .and know for a fact that at least 1, if not 2 pallet beds will be added to a certain room in my house in the coming weeks. ( We've out grown the crib as demonstrated here. ) These pieces, however, make me want to continue on with the theme.

How many pallet derived pieces do you think I can have in my house before it starts looking like a junk yard?

xoxo—Lori Danelle

LinkWithin

Related Posts with Thumbnails