This blog is no longer active. All content from this blog has been moved to my new website: LoriDanelle.com. To view this post on the new site, click here.
***********************************************************************************************I'm really excited about this post. I have something I'm pretty tickled with to share with you!! And I've kept quiet about it for 2.5 days because I didn't have "good" photos yet. (my good, not Brad's good!! Although, I wonder if he'd travel across town. . .)
Believe me, I am not good with exciting news.
Can't keep that secret!!
But I did.
And I'm glad, because. . .well, you'll see!!!
So you know how I was talking about pallet furniture and mentioned this bed over at Ashley Ann's?
Well, I did it! It's done!!
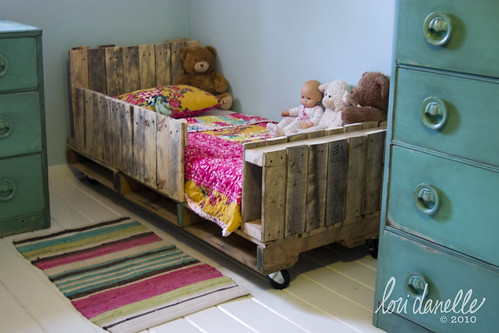
A toddler sized pallet bed, just for Little Sister!!!
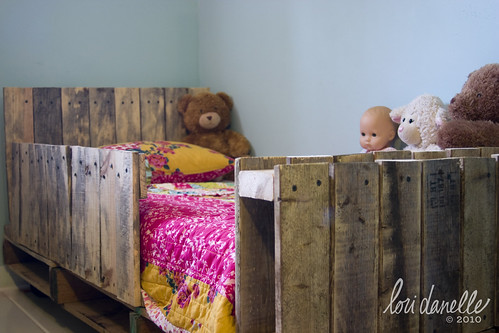
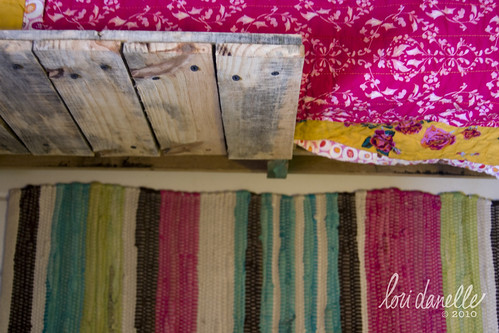
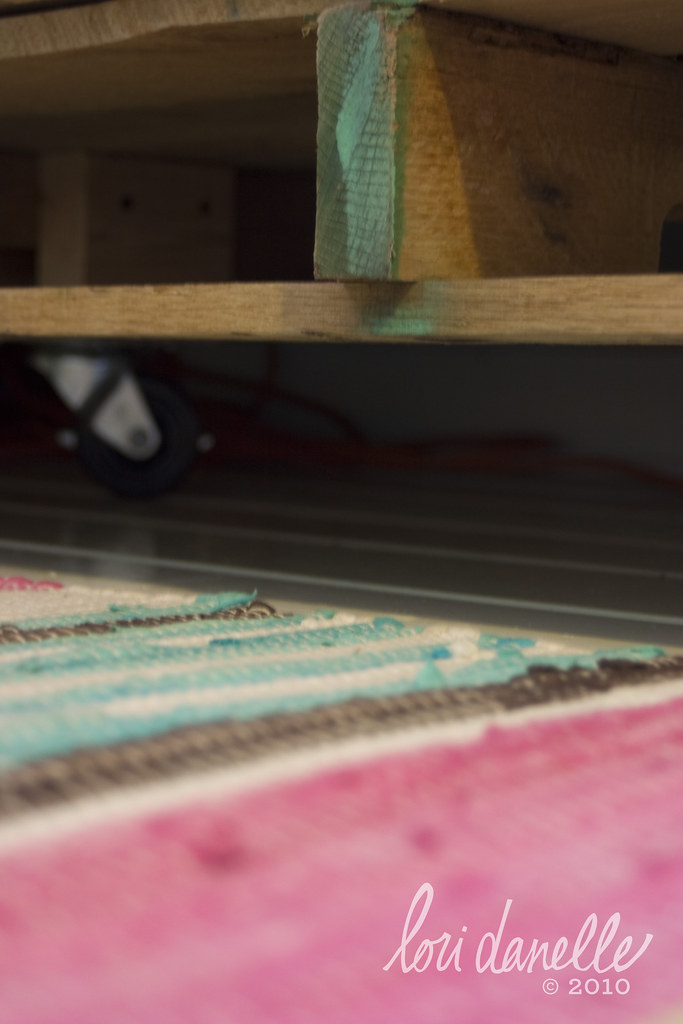
Starting out, I really didn't know what it was going to look like. I sort of figured it out along the way — which is generally how I do things! ha! But I really like the addition of the head & foot boards. (There were a couple of practical reasons as well, which I'll share in a later post.)
Plus, as much as LOVE Ashley's room, I really hate straight copying. There's generally nothing wrong with it, but I'd rather introduce a bit of my own self into what ever it is I'm doing. And that makes me feel like this bed is mine, rather than Ashley's. I like that.
Especially since I've already done my fair share of copying from this room! Look familiar? Yes, it's not exactly the same, but pretty darn close!
And my white, pine floors? Yup. You guessed it.
Ashley Ann was among my inspirations.
Hope she doesn't mind. . . ;)
I added the side rail after Little took her first afternoon nap in it. Though she didn't fall out, a lot of her stuff did & it just made me a little nervous. I think I'm going to go back and shorten it though. Didn't leave very much room for her to get in & out!!

Best part is, both the girls love the new bed. Big Sister has already put in her order for one just like it. (Tom, I'm going to need a couple more pallets!)
xoxo—Lori Danelle
*****edited 06.28.2010*****
To see how I did it, head on over here!!
This post linked to Today's Creative Blog: Get your craft on Tuesday!
Um, that's AWESOME!!! And now that I have visited Ashley Anne, I see where your inspiration comes from. Very nice! I'm sure Tom can part with a few more pallets.
ReplyDeleteIt looks awesome! What a beautiful room, thanks for sharing!
ReplyDeleteIt is just perfect for Little to get her first experience in a big girl bed. She's not a baby anymore. :(
ReplyDeleteSo did you fasten it all together with screws or what. RW
ReplyDeleteOMG! again :) It looks amazing.... I like it better than ashley's style! how incredible that you can build things like that. I usually have the idea but have to count on hubby's effort to put it together. Beautiful!
ReplyDeleteThis so fabulous! Love the uniqueness :)
ReplyDeleteHi, I came over from Jenny’s blog. Such a cute bed. I just finished making one from plans on Knock Off Wood, but I used new wood. I love the look of the pallets, but isn’t it rough? Did you have to sand it a lot? It looks great though, and love the coasters on the bottom! (and I’m coveting you blog background! LOVE IT!)
ReplyDeleteThat is just amazing! Love the quilt too!
ReplyDeletegasp. i am in love.
ReplyDeleteThat is so rustic and gorgeous!!! I am super duper impressed! Thanks for sharing!
ReplyDelete~Alison
http://oopsey-daisy.blogspot.com/
This is so cool!
ReplyDeleteLove it!!! Great job!! I also really like the blue dressers that you have in there too!! New follower!! I am having a giveaway over at my place if you would like to enter!
ReplyDeletehttp://theautocrathaley.blogspot.com/2010/06/100-follower-apron-give-way-and-why.html
That is awesome!!! WOW!! Love your creativity!
ReplyDeletetrottersweetpeas.blogspot.com
Very nice bed! I wonder if you could find some of those flat under-the-bed containers to fit between the gaps of the bottom pallet of the bed. It'd be really cute to dress a couple of them up and slide them in the little nooks for clothes or toy storage.
ReplyDeleteI hate to throw a bummer comment into what is otherwise an ingenious use of pallets... but you should be aware that pallets can contain fungicides, pesticides and other chemicals. Also, a recent study found that 10% of wood pallets used to ship food contained e.coli and other bacteria. Please use caution when reusing pallets esp. around young children!
ReplyDeleteThanks for the concern. I am aware that some pallets are treated with chemicals. The pallets that are not, are heat treated. Both are marked. Mine were heat treated and used to ship electronic products, not food. Caution was used & my children are safe.
ReplyDeleteI'm glad to hear it! Fashionable, affordable, creative and safe :)
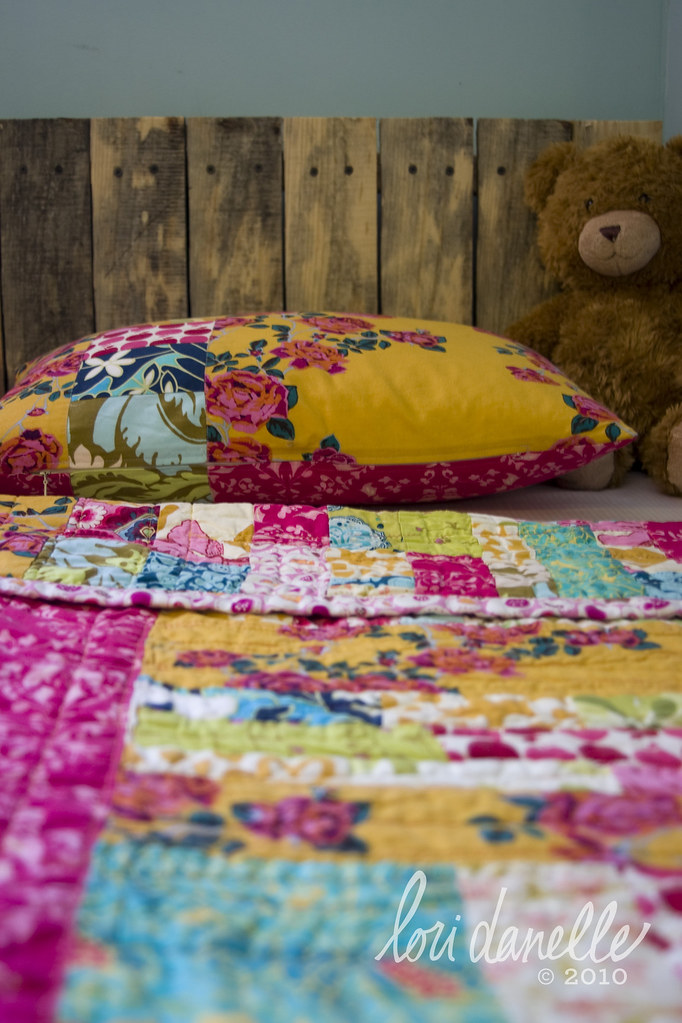
ReplyDeleteSo cute. I would love to know where you got the bedding or fabric you used to make the quilt and sham.
ReplyDeleteThis turned out great! I would also love to know where you bought the quilt. :D
ReplyDeleteHi Lori - just found you from design*sponge. I love this bed and just wanted to drop by and give you a huge well done as it's fab.
ReplyDeleteI was disappointed with all the negative comments over on d*s and am glad Grace has posted succinct and factual comments in response.
Don't let any of this negativity knock you - your makes are amazing and I bet you'll have all your children's friends putting in orders once they see Little's bed!
My toddler would be jealous if he saw it so I'd better shut the laptop down now... don't think my creative skills are up to making him one!! L xox
Hey Lori,
ReplyDeletecan i post this in our blog www.wawerko.de/blog. I love the idea!!!
Kind regards,
Erik
Lori, the entire room is lovely. What took my breath away was the dressers, particularly the shade of green. Would you share the color, please?
ReplyDeleteP.S. Your girls are adorable.
Allison, I'll have to go down to my basement and find the paint can! I did a post about those dressers once upon a time, but I don't think I explained my process, so perhaps I should do that! :)
ReplyDeleteEveryone else, Thanks for the wonderful comments! Yes, it's been a bit sad to see so many people forget both their manners and that a person with feelings was the maker of the bed. I'd be surprised if many of them would say those things to my face, so it's a bit disheartening that saying them on the internet is considered OK. Oh well! We've been having a good laugh over them instead of taking them too seriously. I never expected everyone to like the bed after all!
Erik, I can't find a way to contact you directly, so hopefully you'll find this!!
ReplyDeleteI appreciate your interest in the bed! As long as you give me credit and link back here, I'd be happy to have you post it on you blog. Thanks!!
Hi Lori
ReplyDeletei`m writing a report for WGSN ( I work here) about upcycled furniture and I really want to use this images to illustrate it? can I? Of course I`ll give the credits... would you send me an email on heloisa.righetto@wgsn.com if are not ok with it? many thanks
Wow. Looks really great! It goes pretty good with the other furniture in that nice kids room. What I´m just a bit worried about are the sharp corners. Little kids might hurt therselves on them. You could smooth down the corners a little with some sandpaper. I like your Blog. The Design is awesome!
ReplyDeleteNow this one's really great. Krokodil Kostüm
ReplyDeleteWhere did get that bedding? So cute!
ReplyDeleteWow.. loved it a lot. Krokodil Kostüm
ReplyDeleteOH MY GOSHHHHHH!!!!! I am so totally obsessed with this! You did such an amazing job!!! I recently became really into pallets and their multiple uses and I just so happen to need a toddler bed for my two year old who has been scaling his crib bars every night! ughgh! Thanks so much for the inspiration. I will totally link you pictures when I'm done! :) :)
ReplyDeleteWow! That's sooo cool!
ReplyDeleteWonder if I can make my husband see how cool it is aswell...? ;)
My almost-2-years-old boy needs a new bed soon, and I've started looking for potetial beds and ideas! Your bed is now high up on my list :D
//Kali- (Norway)
how did you attach the headboard and footboard to the bed base? i can't seem to figure it out.
ReplyDeleteKat, in the first picture, do you see the boards at that are sandwiched between the footboard slats at the very bottom & almost to the top? The trick is to screw the bottom one into the bed base BEFORE adding the slats (leaving enough room from the edge for the depth of the slats)
ReplyDeleteOnce you have the base in place, you will then line up and screw in the slats. Once you have both sides of slats done, slip the top board in place between them, screw on both ends so you don't have to hold it any more (help is nice with this step), and then screw the rest of the slats into the top board as well.
Good luck!
There is obviously so much to know about all this. You have made good points in all areas
ReplyDeleteYou have work at all this news; you are doing a great job!